45 Free Instagram Premiere Pro Templates
In this article you’re going to learn how to install and customize free Instagram story templates from Mixkit to match your brand or style. These templates are .mogrts (motion graphics templates) that must be installed inside of Premiere Pro’s Essential Graphics Panel. You can then insert your own videos, customize text and colors to your style, and then export.
Step By Step
Step 1: Download the Free Templates from MixKit
For this demo, I’ll download the template here called the “large video box story.”

All you need to do is just click on the arrow button to download it and it will begin to download.
Step 2: Unzipping File & Installing Fonts
In your downloads folder you will see that there's a zip file, so just double click to unzip that. You will see a .mogrt file which we will install in premiere pro, a preview file that previews what it looks like, and a text file that includes a list of all the fonts you need to download to use the template. This particular .mogrt uses Gilroy and Bebas Neau, so you can go to these URLs if you need to download the fonts before you install the mogrt.


Note: It’s important to note that you will be able to change the font to your own font, so downloading these fonts is not 100% necessary.
Step 3: Import into the Essential Graphics Panel
Next, we're going to go into Premiere Pro to the Essential graphics panel. If you do not see the essential graphics panel, go to Window> Essential graphics. Then from this panel in the far right there's a little button here that has a plus icon. Click on that button and go to your downloads folder. Let's install this .mogrt file by selecting the file and hitting open. Be sure to wait a few seconds for loading time. Your upload will then appear at the very top.

On the right is the Essential Graphics Panel
Step 4: Create a Vertical Sequence
Before dragging the .mogrt into the timeline, we first need to create a sequence in an Instagram story aspect ratio.
From the project panel, go to the new item icon and select “New Sequence.”
Next, choose any of these presets listed to start from. Here I will start with the Digital SLR 1080p and we can choose 30fps
Then from settings, we will need to flip the horizontal and vertical. Change frame size by putting 1080 for horizontal and then 1920 for vertical, so it's a 9x16 aspect ratio. You can now save this as a preset; just be sure to give it a name like Instagram story 30 FPS.
Next hit Ok and you can see your new preset Instagram story. Now, select this new preset and hit ok. This will open up your new 9x16 sequence

Step 5: Drag & Drop the Template into your timeline
Now that the sequence is open, drag and drop this template into the beginning of our timeline. You will see a warning come up that says the clips settings are different than sequence settings. If we want to match it to the settings that came with the .mogrt template, just hit change sequence settings. Doing this will not change the aspect ratio, but just to match the settings of the Instagram Story Template. But if you want to keep your custom settings, just hit “Keep Existing Settings.”

Step 6: Add your video to the template placeholder
First move your template to video layer 2 in your timeline
From your project panel, place a video clip in Video layer 1 to fill in the blank area of the template. If we go to the wrench tool and select the transparency grid, you can see that this black area is actually transparent.
Select the video clip on video layer 1, then go to Effect Controls panel to scale and reposition in order to make sure your video clip fits nicely in the frame. Adjust accordingly for your chosen footage.

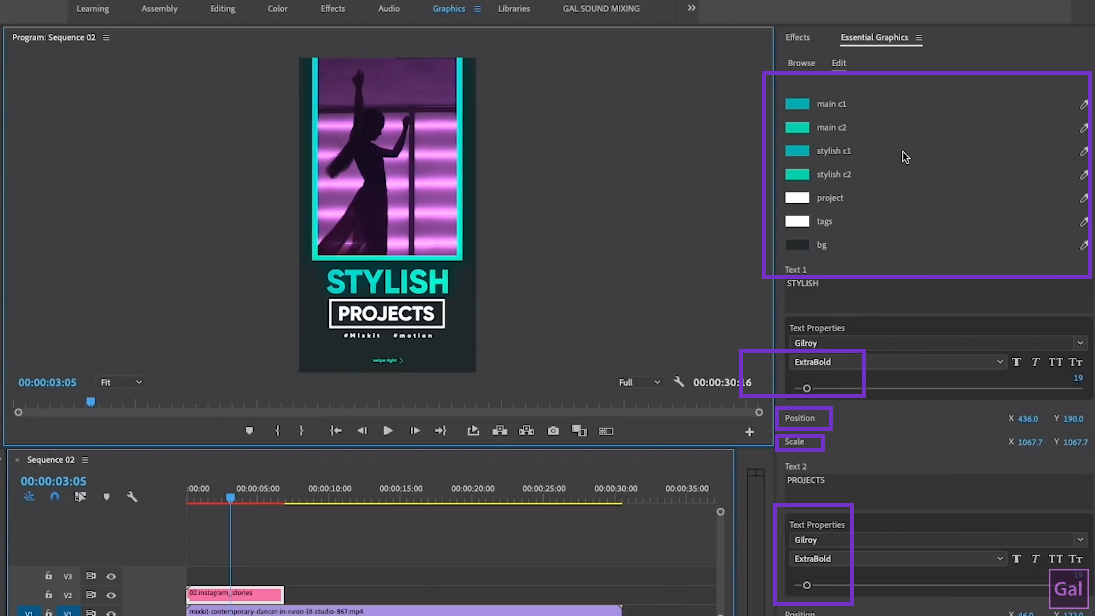
Step 7: Customize in the Essential Graphics Panel
Select the Instagram stories template and now you see a group of different controls in the Essential Graphics Panel that we can customize. You can change color, text and resize text. You can also adjust the length of the video to meet the duration of the Instagram story template.
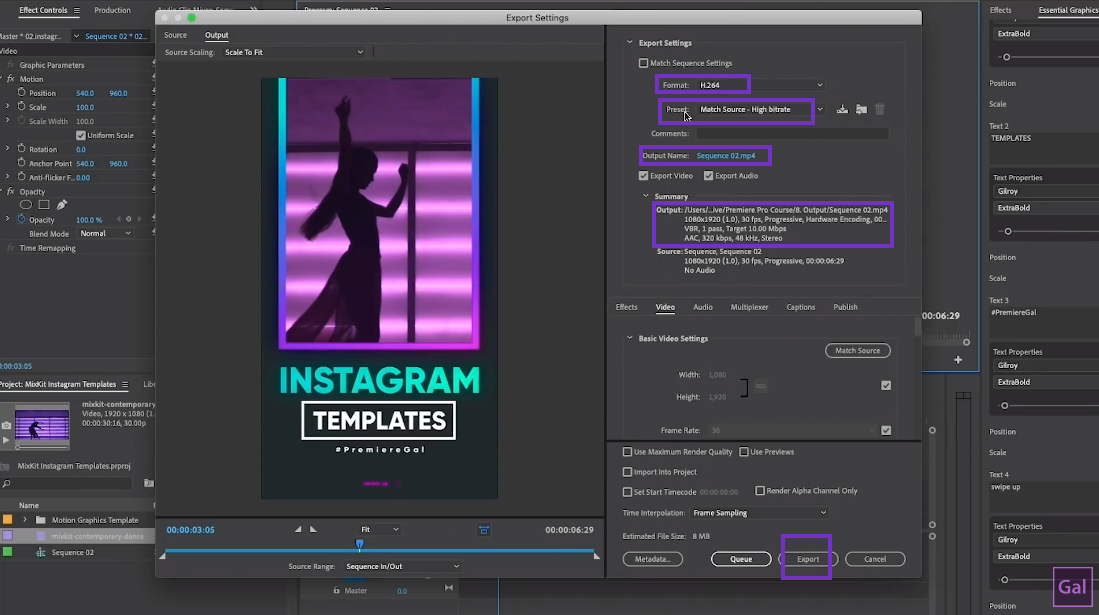
Step 8: Exporting for Instagram
You can now export it for Instagram. What I recommend doing is going up to File > export media. Now, there's not a preset for Instagram here, but that's OK. Use H264 format and just keep it at the preset “match source high bit rate” which is matching it to the sequence settings. Then choose an output name and a desired location to save to. Be sure to look at Output summary after Output Name; this tells you the path to where your export is going. This is very important if you wish to find your work after exporting while on the computer. Save and then hit export. If you're an Apple user, use AirDrop to send it over to iPhone and then you can add it to Instagram profile. Or you can save it to Google Drive if you’re on a PC.
So that's it to using the Instagram story templates in premiere pro. Insta-awesome!