Everything you need to know about Wondershare Filmora Video Editor
Filmora is a perfect video editor for online social video editors, vloggers, home movies, and more. And it’s compatible for both Mac and PC users. If you’re someone who needs multiple sequences, the ability to edit different types of picture profiles, it’s not the software for you. If you are interested in Filmora Pro, I made a review of that software comparing it to Premiere Pro, watch it here.
The best part about Filmora is that you can get started today for free. The free version has a watermark on export. Once you try it out you can buy Filmora X once for $59.99, no subscription needed!
And you can choose to add a Filmstock subscription for an additional $9.99/month which will give you unlimited download of royalty free video effects, audio, and stock video. Id’ suggest to try it out for a month and see if you use the stock assets, if so, it’s a pretty sweet deal.
Now let’s see how it works and I’ll highlight some new features you should know about.

Importing and Recording Media
Importing media is really easy in Filmora, it supports all types of formats, from MP4, WMV, AVI, MOV, 3GP, MKV, F4V, WEBM, GIF, and more.

Also, want to mention that you can also record content within Filmora. You can create your own movie recording with your webcam, or you can create a high quality own screen recording too. it comes built in with the Wondershare screen recorder, where you can record your screen at any resolution, frame rate, and include your webcam. This is one feature that is not available in Premiere Pro and a lot of people ask me if it is! If you need a screen recorder with your editor, then this software is for you.


Fast Rendering and Playback Speed
In Filmora X, you can use GPU accelerated playback. It’s so super fast now. You can also choose to play it back at lower resolutions for better speed if you are working in 4k or above. And if you want to render it fully out as a rendered video to view, just click on this button here at any time.
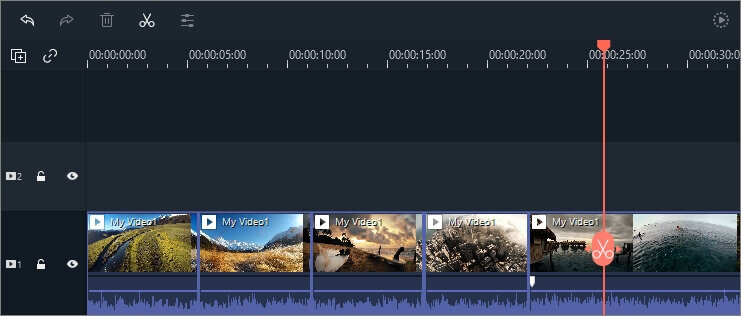
If you want to quickly scrub through the timeline just click and hold on the scissors here and drag left or right to move within the timeline.
Basic Cuts or Splits
Cuts or Splits are easy to make in Filmora. Drag your playhead to the location of the cut and you can click on the scissors icon to make a split and then press the delete key to delete off the excess clip.
If you prefer to use a keyboard shortcut instead of press the scissors icon, you can go to Keyboard shortcuts, and under tools we can change the Split shortcut to “C” which for me is easy to remember because it’s C as in Cut. You can learn more about the types of cuts, crops and trimming you can do in Filmora here.
Transform Tools
As for some basic transform tools, you double click on any clip and in a new window you’re given a new set of editing options. From the video tab, you can scale, position, and rotate image. You’ll also find other parameters here you can adjust.
New! Audio Ducking and Sound Mixing
The most useful new tool in Filmora is audio ducking. After you add you music to your second audio track you can select your dialogue video clip and from the audio tab you. can choose to “Lower the volume of other clips. You can use a slider to change the strength of the ducking. And as you move the slider you can see that Filmora automatically lowered the waveform of the music.
If you need to make further refinements, you can click on the audio mixer and you can adjust the video audio and the music audio using these sliders.

Color Matching, LUTS, Color Correction and Side by Side Comparison
I was very surprised at the advance color correction tools offered in Filmora. They do not have an advanced sets of scopes to monitor, but it offers the tools you need to create professional looking shots. How does it work?
After you double click on your clip, you can go to the Color Tab and go to advanced. This will bring up a new tab of a bunch of presets you can apply to your clips or you can go to the adjust tab to apply customized corrections to the white balance, contract, exposure, vibrance, and more.
You can also import your own LUTs to the clips. For example, if you shoot in a high dynamic range camera profile format, like C-LOG, S-LOG, F-LOG etc, you can use the LUT importer to make your clips look graded and of higher caliber.

Filmora also added Color Matching, so you can match the color of two different clips to create more consistency in your shots.
Lastly, if you click on the eye in the upper right of the advanced color window, you can see the before and then the after, or I can click on a side by side view, to compare. I was pretty impressed at what you can do. I do wish it had more scope graphics so I can test skin tones and see the luma waveform to measure the brightness of the clip.
Motion Tracking and Effects
Here I have a skateboard clip in the timeline, I’m going to go up to Tools > Speed and Duration and first slow it down to about 50% speed. Just by moving the slide. Now I want to track his back to add some wings. So double click go to motion tracking and center the tracking around the back and track it forward. Now from the Elements, bring the wings into the timeline, and then go back to tracking and select the new elements layer you want to link to the track and this is the final effect.
Titles and Openers
Filmora comes built in with a lot of lower third titles and openers templates. These are similar to motion graphics templates that Premiere Pro uses. You can double click on them to preview and simply drag to your timeline, then double click to customize the font, size, and color. One thing I wish you could customize is the color of the backdrops.
There’s lots of Transitions here too that you can drag and drop on to your clips. And some cool animated elements, and you can which ones are included and which ones you’d need to buy from their Filmstock site.

Split Screens
Unlike Premiere where you need to customize your split screens from scratch or purchase templates, Filmora X comes built in with Split Screen templates enabling you to drag and drop whatever video you want into them. You can drag whichever template you want into the timeline. Then drag your videos into the placeholders.

More Effects!
Of course there are loads of other effects you can do, such as green screen, Magic Effects, Removing Objects, and cloning effects. You can watch the Wondershare Filmora Video Editor YouTube channel to check out some of those effect tutorials