Improved After Effects Roto Brush 2.0 Makes Rotoscoping Faster Than Ever

The new Roto Brush 2.0 in After Effects improves on the original Roto Brush tool and makes advanced rotoscoping available to a wide range of video creators, saving countless hours of effort, even with difficult footage. The new Roto Brush works with complex moving subjects and no green screen is needed thanks to the power of Adobe Sensei Machine learning which can better distinguish and predict the background from the foreground.
So if you’ve ever watched some videos where someone wasn’t in front of a green screen, but then the editors were able to cut them out perfectly and put a new background or something behind them? They likely used Roto brush to do this!
What is Rotoscoping?
Rotoscoping was originally developed as a technique used in animation to trace over live-action motion picture footage frame by frame in order to create more realistic animation. But now, rotoscoping is used in After Effects to composite visual effects in live action. Rotoscoping can be used to replace or add visual effects behind the foreground moving object. Or you can also use rotoscoping to add selective elements to the foreground or remove objects from the background.
How does it work? Tutorial Step by Step.
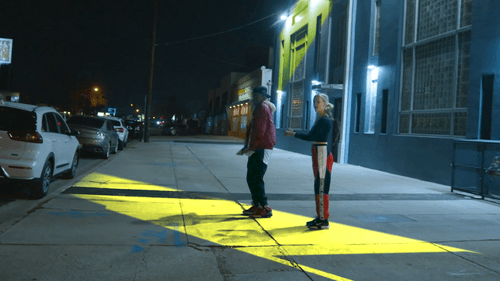
For this video clip, we’re going to place some cool colorful visual background effects behind these dancers using the Roto Brush tool.
First, double click the footage you want to rotoscope as a new layer window. And choose a frame where the subjects are fully in view.
Then select the Roto Brush tool.
Begin to draw over the subject to select it. You don’t need to trace edges. Just select part of the subject and Roto Brush will auto detect it’s outline.
To remove from the selection, hold the ALT key and click. To add to the selection, click and drag.
And once the subjects are selected, hit play and Roto Brush 2 will then analyze the subjects movements from frame to frame.
If you find any mistakes in the selection, you can use the Roto Brush tool and hold the ALT key to remove the mistaken selection.
Once the selection is good, go back to the composition panel and from Effect Controls, you can adjust the Roto Brush & Refine edge effect to refine the moving cut outs using Motion Blur and Decontaminate Edge Colors, this will make sure the cut outs are as perfect as possible for composition.
Then you can place your visual effects or background textures behind the cutouts as layers. Be sure to duplicate the original video clip and turn off the Roto Brush effect to preserve the original background.
Preserving Transparency in Premiere Pro
And one quick tip, if you would like to preserve transparency when sending a clip back to Premiere Pro Premiere Pro using Dynamic link. Just save the composition without any background and go back to Premiere Pro, and from the wrench tool you can turn on the transparency grid and you’ll see that it has as transparent background from which you can add backgrounds in Premiere Pro.