Filmora Pro Versus Adobe Premiere Pro Honest Review
FilmoraPro by Wondershare is a much less expensive video editing software alternative for emerging social media editors. It works on both Mac and PC computers and at just $149.99 (Lifetime) or $89.00 (per year), FilmoraPro is a steal and better yet you can also download FilmoraPro for free (it just adds a watermark on the export).
But does the price make it a worthy alternative to Premiere Pro? The short answer is: yes, for editors working on social media videos.
But, lets dive into the details to show all that FilmoraPro has in relation to Premiere.
What FilmoraPro Has
A Familiar NLE Interface
If you’re looking for a similar editing NLE (non-linear editing) interface as Premiere, FilmoraPro has it. When I first opened FilmoraPro, I could instantly see that they have a similar UI as Adobe Premiere Pro’s. Here is the side by side below:
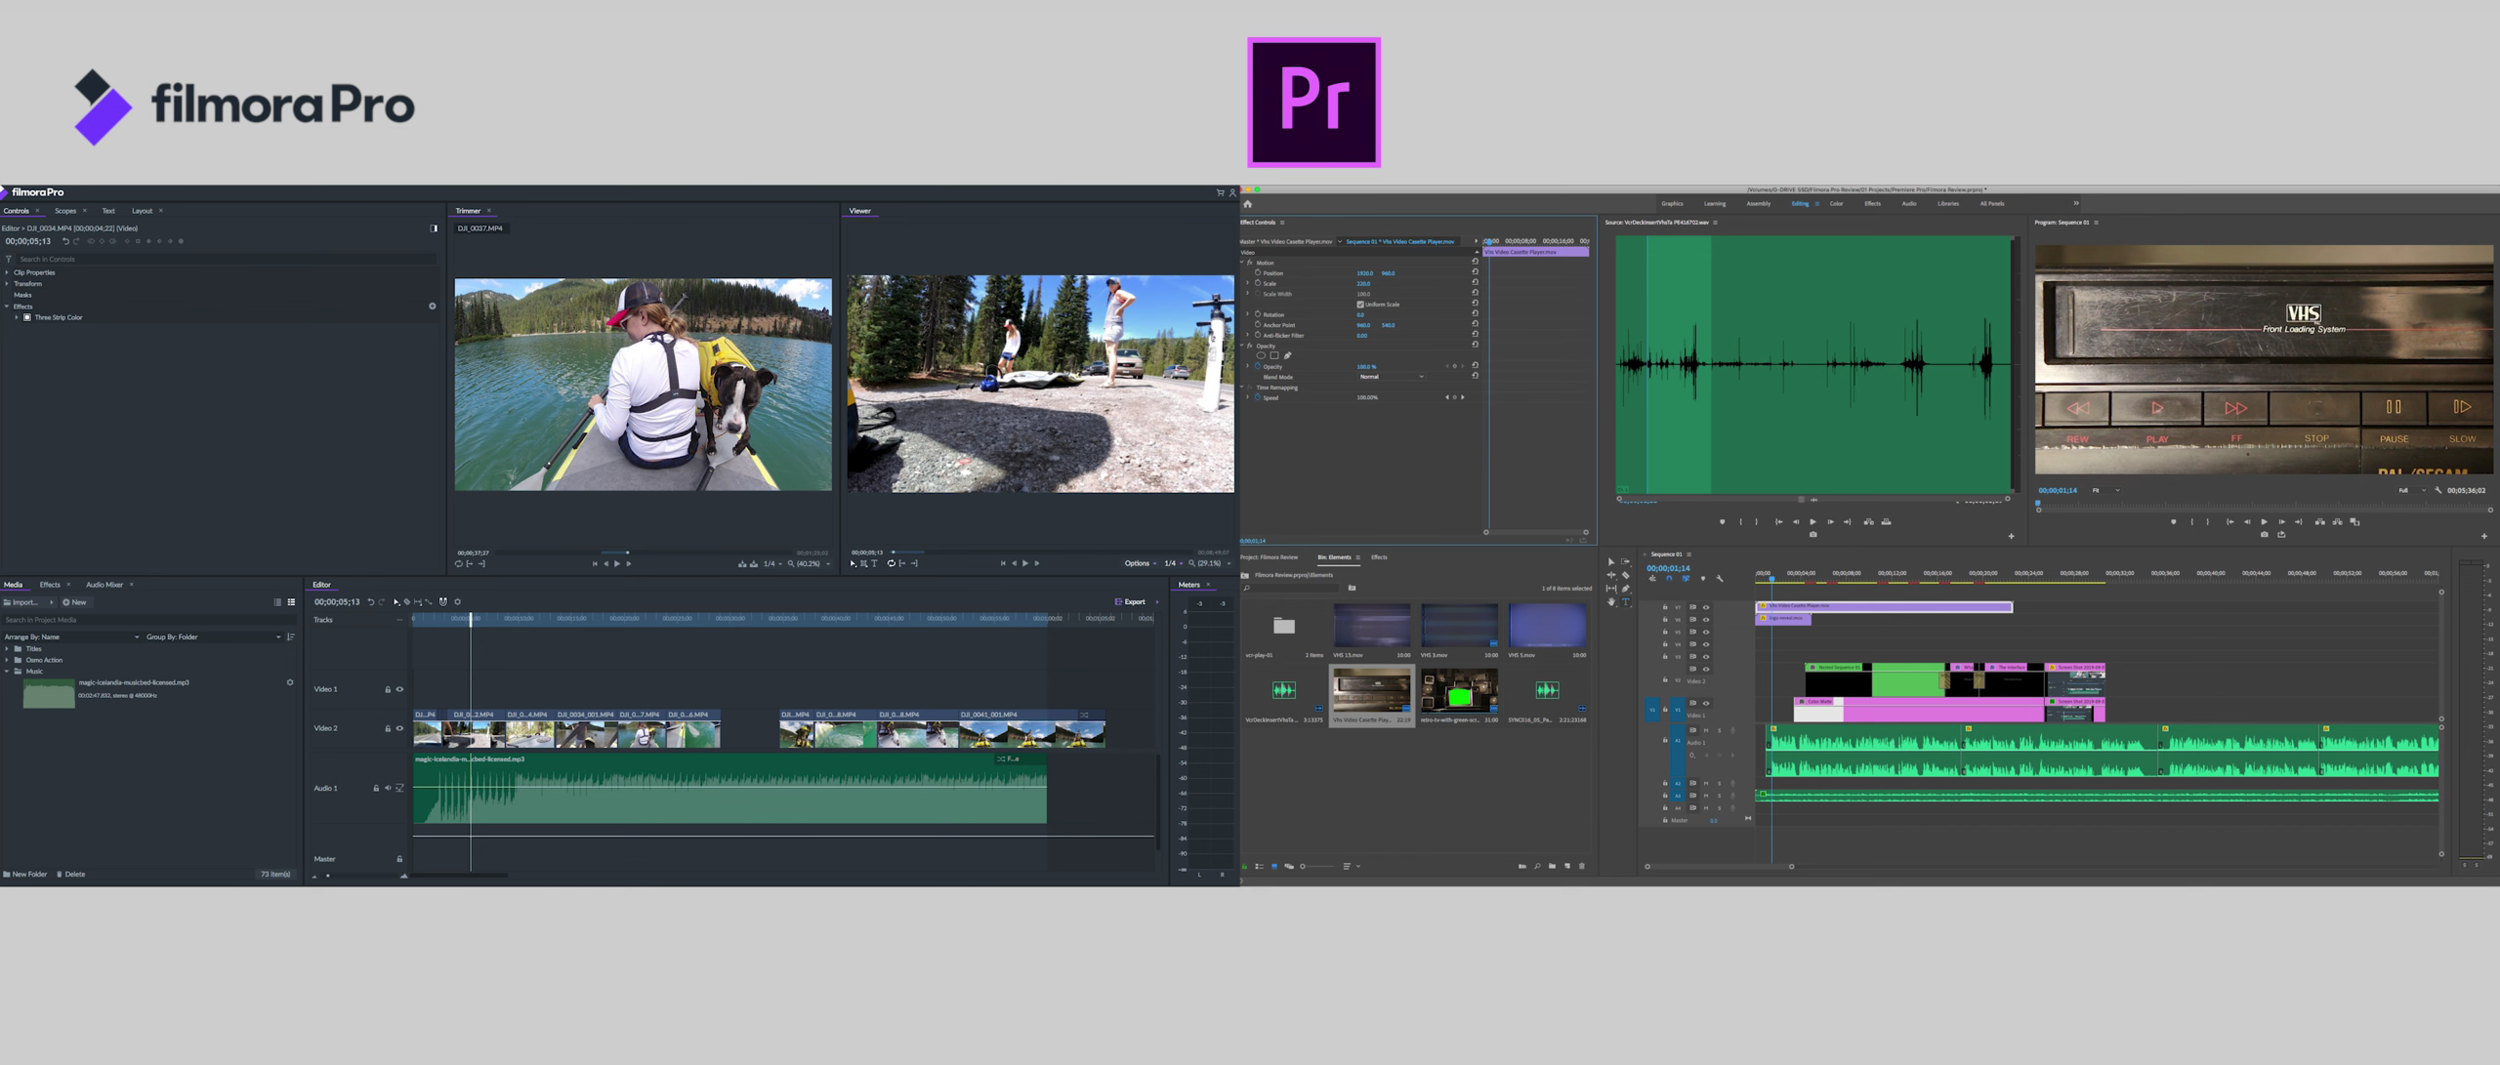
Side by Side: Filmora Pro (left) and Premiere Pro (Right)
Customizable Workspaces
Just like Premiere, FilmoraPro also has dedicated workspaces designed for editing, color grading, audio editing, text and titles, effects and more. You can also customize and save your own workspace
Media Panel
The media panel is very similar to Premiere’s “Project Panel.” You can create folders in your media Panel where you can import footage, photos, video and more. You can open clips up in the trimmer and select “in and out” points to start created your project’s selected material.

Filmora Pro’s Media Panel
Timeline Presets
Unlike Premiere Pro, when you open FilmoraPro, a timeline is already open. And it’s not called a timeline, it’s called an Editor. You can click the gear icon to customize the timeline’s frame size and frame rate. You can also select from multiple different types of presets, from Instagram to GoPro.

You can easily change your timeline’s setting, such as frame size and frame rate, using “Project Settings”
Timeline Tools
You can customize the track sizes and also rename and insert new video or audio tracks. The edit tools include the selection tool, cut tool, slip edits, rate stretch tool. and most importantly snapping clips together.
In FilmoraPro, you can also customize keyboard shortcuts from the Preferences panel so you can use the same keyboard shortcuts as Premiere.
Playback and Resolution
Unlike Premiere Pro, FilmoraPro doesn’t have a render option for playback. You hit play and it will render as best as it can as it playback. You can reduce the playback resolution, but there are some lagging issues with playback. I found it can be delayed and sometime freezes with 2.7k and 4k footage. This could definitely use some improvements since 4k is becoming a standard for editing.
Title and Motion Presets
FilmoraPro comes with great built in title templates that you can edit and customize in your video. And just like Premiere you can purchase more, but instead of from Adobe stock, you can purchase more templates from Wondershare’s Film stock library.

Drag & Drop Effects
In my opinion, FIlmoraPro has far more and far better built-in effects than Premiere Pro. It has effects like light leak transitions, films grains, and two tone looks, which Premiere Pro does not come with (you have to buy those separately). You drag and drop effects on the clip or with transitions drag them between clips. It also has a control panel where you can customize your effects, your clip’s transform tools, and keyframe as well.
Color Correction & Grading
FilmoraPro also has all the core color effects, including curves, LUTS, vibrance, temperature and more. If you’re in the color workspace it also has scopes so you can read color.
Export
You can export a video by using an in and out point in the timeline or by exporting all the content.
What FilmoraPro does not have
Multiple Sequences: You cannot have multiple timelines open at once, you can only work in one timeline at time. With Premiere Pro you can have multiple open.
Adjustment Layers: There are no adjustment layers for applying universal effects to multiple clips at once.
Dedicated Color Panel: It does not have a Lumetri color panel to make universal color grading and correction effects.
Dedicated Sound Panel: It does not have an Essential Sound Panel where you can make universal audio adjustments to any time of audio
No Audio Preferences: It does not have audio hardware preferences to record audio directly into Premiere Pro
Conclusion
Overall, FilmoraPro gets the job done, but it does need major improvements to it’s playback/rendering and it lacks some panels that make it faster to apply color & audio adjustments in Premiere. But, considering it’s only $149 it’s definitely worth the money.
So what do you what you think from first glance, do you think it is worth it? You can start using Filmora Pro for free with a watermark and if you think it’s good fit for your workflow you can purchase a license to remove the watermark.
I’d love to hear your thoughts, please leave a comment below!