How to Use Proxies to Edit Fast in Adobe Premiere Pro CC

When you edit in 1080p or 4k video inside of Premiere Pro CC, you may experience some lag depending on your computer and your GPU (graphics processing unit). While having an up to date computer (recommended MAC and recommended PC) is important, there are ways to further improve playback and overlay speed of your workflow using proxies, lower resolution substitutes, to speed up your workflow.
Here is what you need to know (read and watch tutorial):
1. Creating Proxies
The process for creating proxies begins before you import your footage into Premiere Pro.
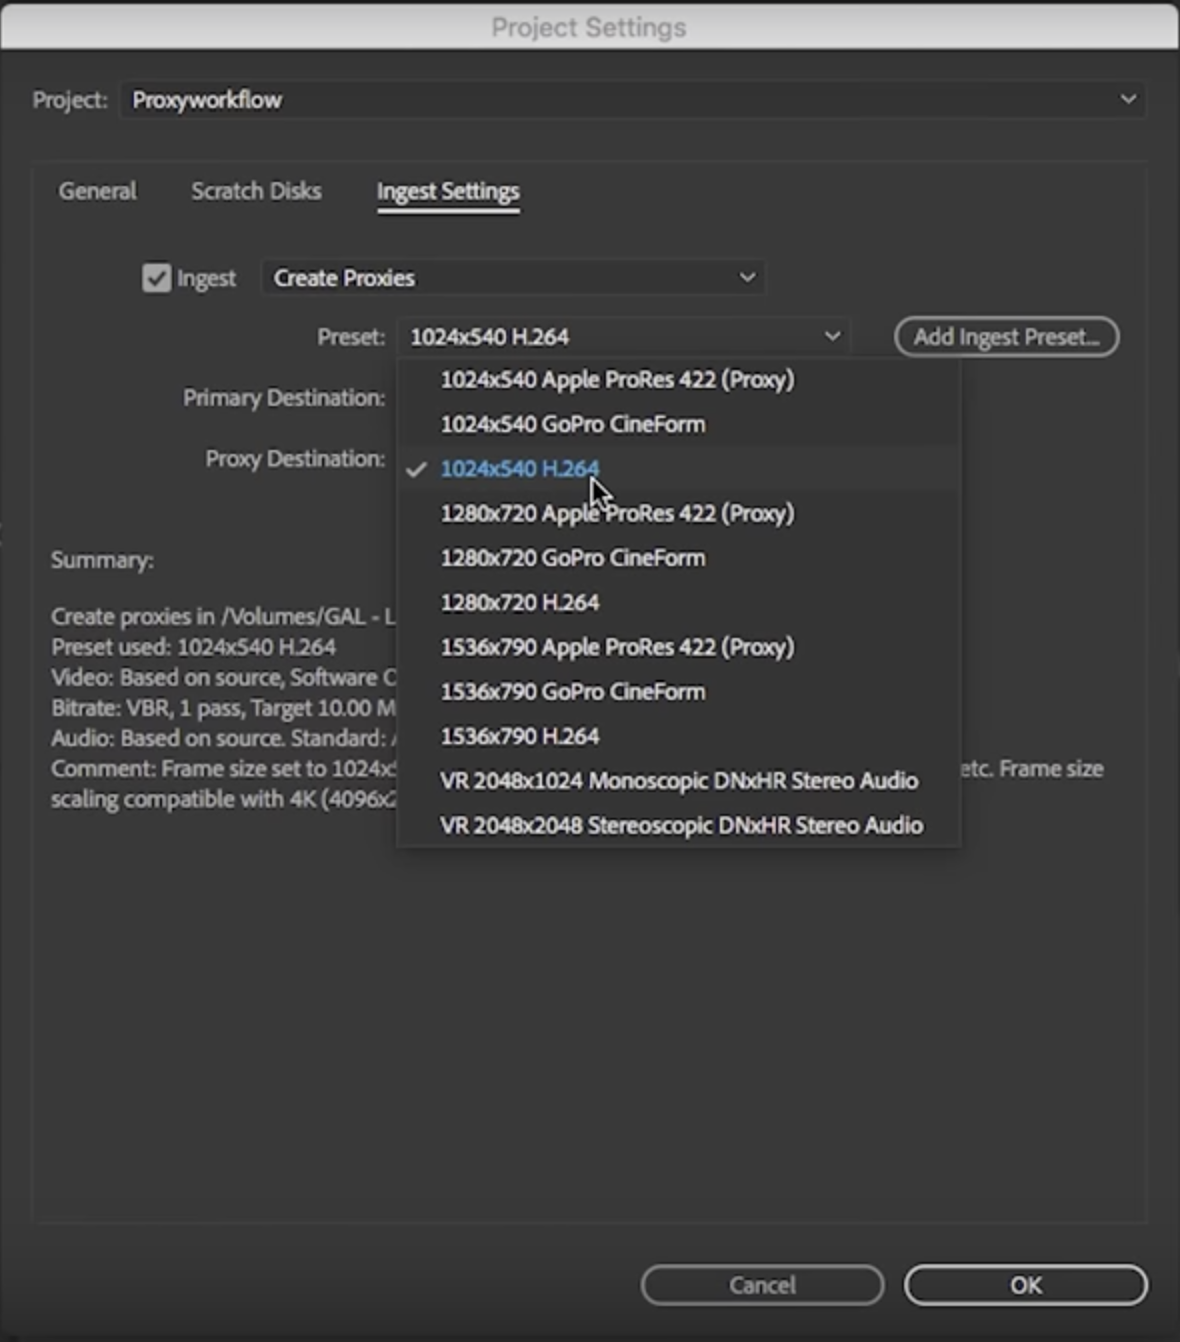
From the Media Browser, open up your folder containing all the full res clips you want to make proxies from. Then select the "Ingest" the button and next to this, click the "wrench" tool to open up ingest settings.
Next to Ingest, you want to select "Create Proxies" from the drop-down. Then you need to choose the proxy resolution preset. Here are some common resolutions and my proxy resolution recommendations:
- UHD(4k) 3,840x2160
- Recommended proxy resolution: 960x540 (1/4 size of full res) or 1280x720 (1/3 of resolution)
- Format: H.264 or Cineform
- "Cinema" 4k 4,096 x 2160,
- Recommended proxy resolution 1024x540 (1/4 size of full res)
- Format: H.264 or Cineform.
- FHD (Full HD) 1920x1080
- Recommended proxy resolution 480x270 (1/4 size of full res)
- Format: H.264 or Cineform
If you do not see a preset that works with these common full resolutions, you need to create a custom proxy ingest preset using Premiere Pro's export dialogue.
First go to File > Export > Media and create a new export preset by selecting H.264 or Cineform format, and then adjust the resolution frame size using the video tab, then save the preset using the save preset button.
Give your preset a name and when you save it, it will save to your computer with a ".epr" extension.
Then to import your Proxy export preset go back to the wrench icon in the Media Browser, import your proxy ingest preset with the extension ".epr"
Then from here, choose an export location for all your proxies.
Now when you import your video files into your Project panel, Adobe Media Encoder will launch and begin encoding proxies for each file.
2. Proxy MetaData in Project Panel
After Adobe Media Encoder finishes exporting all the proxies, right click on the top menu display of your Project Panel and select "Metadata Display" here you can make sure to select Proxy File Name and Proxy File Location to reveal the proxy information in your project panel.

If you see a proxy file name and location in your proxy panel, this means the proxy's have been created and are attached to your original resolution clips.
3. Editing with Proxies
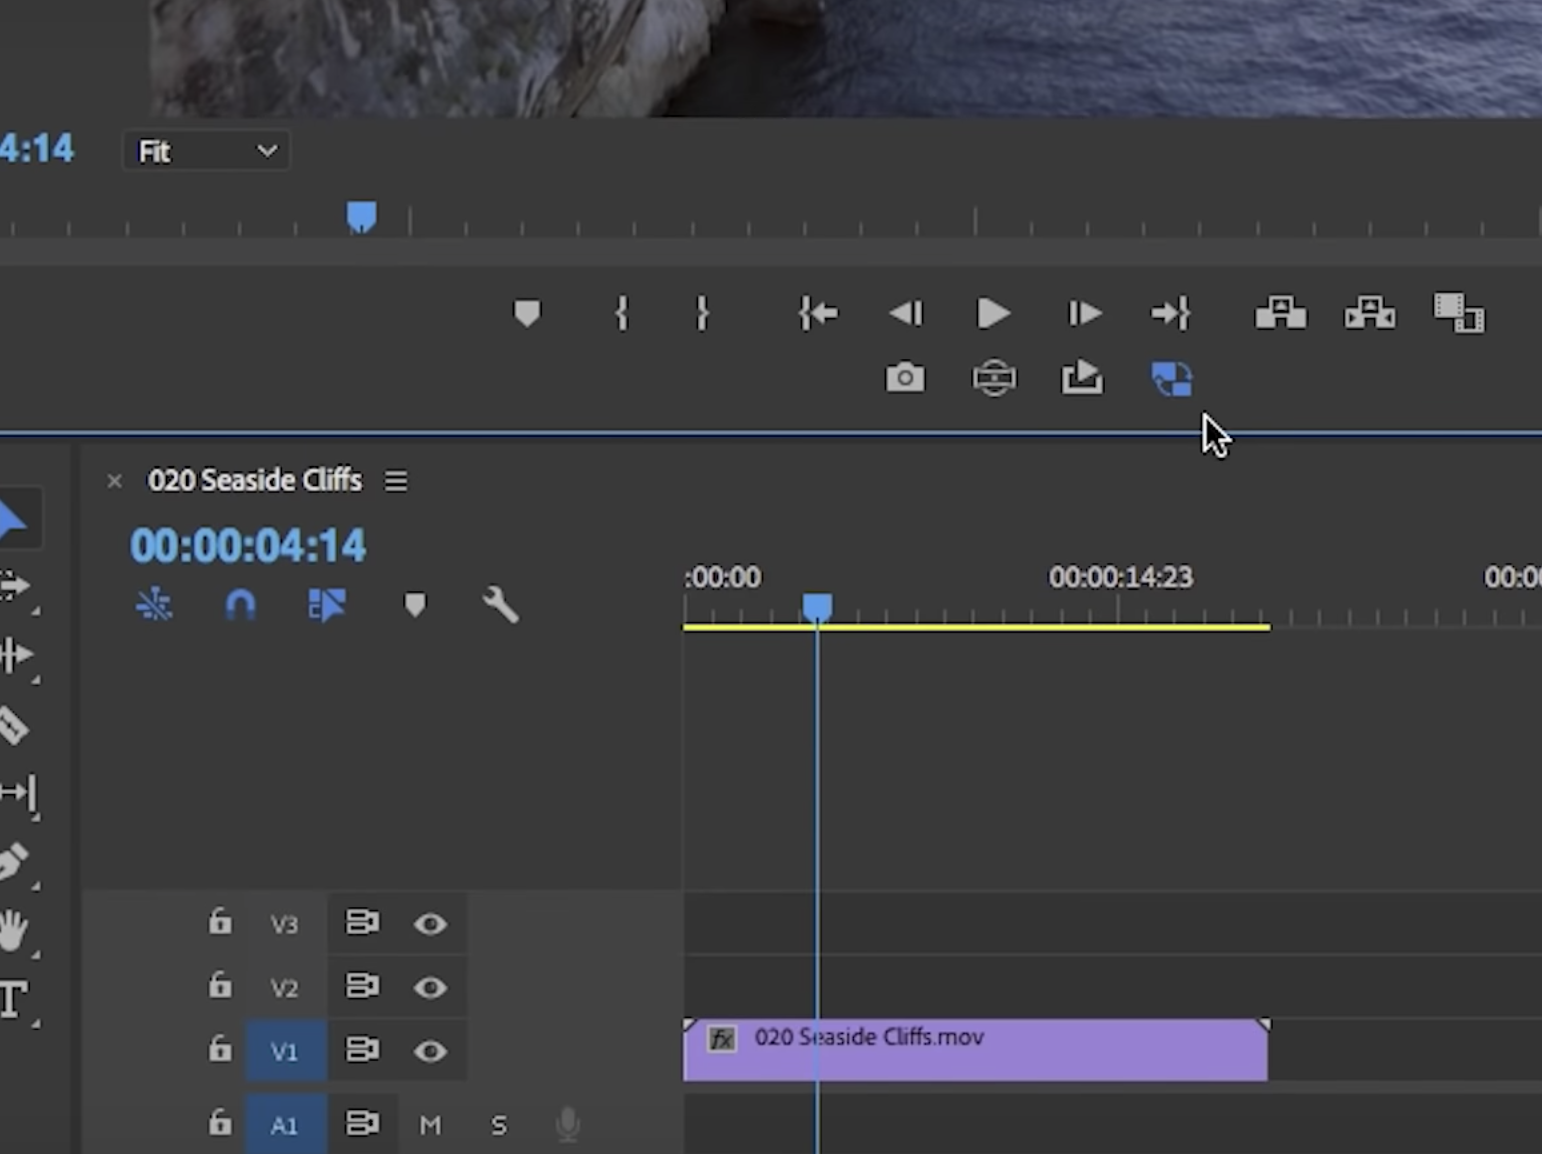
Now that proxies are created. How do you edit with them? Well, first create a new sequence from the original clip in your project panel. Then from the Program Window click on the "Toggle Proxy" button. After you click the button will turn blue. This will that switch the clip in the timeline to work with the proxy version of the clip. And now you are editing with proxies!
If you are still experiencing lag, you can reduce the playback resolution to a 1/2., 1/4, 1/8 or 1/16th of the resolution.
If you have any questions about proxies, please leave a comment below and watch the full tutorial here to make sure you understand the steps!