3 Motion Tracking Effects in Adobe After Effects
Motion tracking enables you to track the motion of a shot and then apply that motion to any added elements in your scene. Let’s say you wanted to attach text to a static object, add an animated call out to a moving object in your scene, or replace a screen in a moving shot; after reading, you will have the tools to achieve all three effects. When using motion tracking effects, you will find that they add to your composition and are very quick to assemble within your scene. Read on to get started!
1. Track & attach text to static object in a moving shot
To begin this tracking effect, start off with adding stock video into your composition. Use the Text tool to type in “Brooklyn” using a font called “ Go Extra Bold Regular”. Next, select text and scale it up so it’s nice and big. Now, place the text so it appears to be resting on top of the side of the bridge.
As you hit play, you’ll notice that the word does not move with the camera movement; so we will need to track the motion of the video clip. To do this, go to Window > Tracker. Select the video clip from the composition and move the playhead to the beginning of the comp.
**This is super important because tracking should start at the beginning of the clip.
From the Tracker Panel, select “Track Motion” and then alter the zoom of the composition so you can have a better view to move the tracker point into place. Click and drag the Tracker Point to a point of the bridge that includes both light and dark contrast. Now you will need to select a target so go to Tracker Menu and select Edit Target. In Pop Up Motion Target window, select Brooklyn layer and hit OK; this is going to be the target layer. Hit play until it tracks all the way through the composition layer. Once it’s done, hit apply and be sure to apply to both the “X & Y Coordinates”.
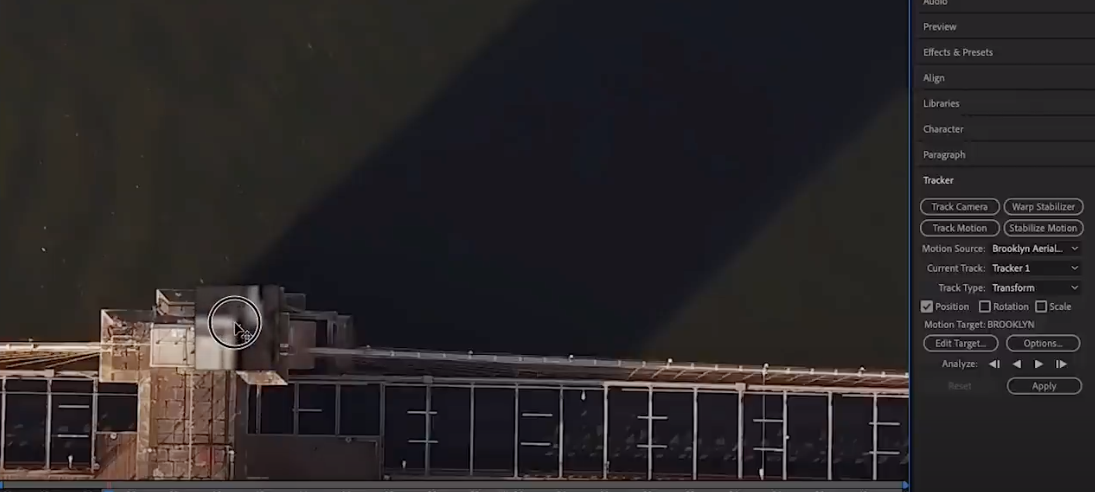
Select a tracking point region with high contrast.
Open up Text Layer > Transform > Position. You will notice that all of the tracking information was transferred over as key frames, however it is in the wrong location. To fix, you will need to adjust the position of the text. Go to Effects and search for “Transform”, which is located under Distort. Double click to apply to the text layer. Next go to Effects Control to adjust the X and Y positions in order to change position of the text without damaging the original tracking data.
Once you have the text in the position you want, you are good to hit Spacebar to play and enjoy your final result.

2. Track & attach animated callouts to moving objects
Attaching animated text to moving objects, whether it be a person’s body, car, or other moving vehicle, is a popular effect commonly used in TV shows, commercials and social videos. You can, of course, create your own text or motion graphics to attach, but I’ve downloaded a pack of animated call-outs from Envato Elements to use in this effect.
After downloading the animated callouts, you see that there are AE files for each type of animated call out. Drag the AE files that you want to use - into the AE project Panel.
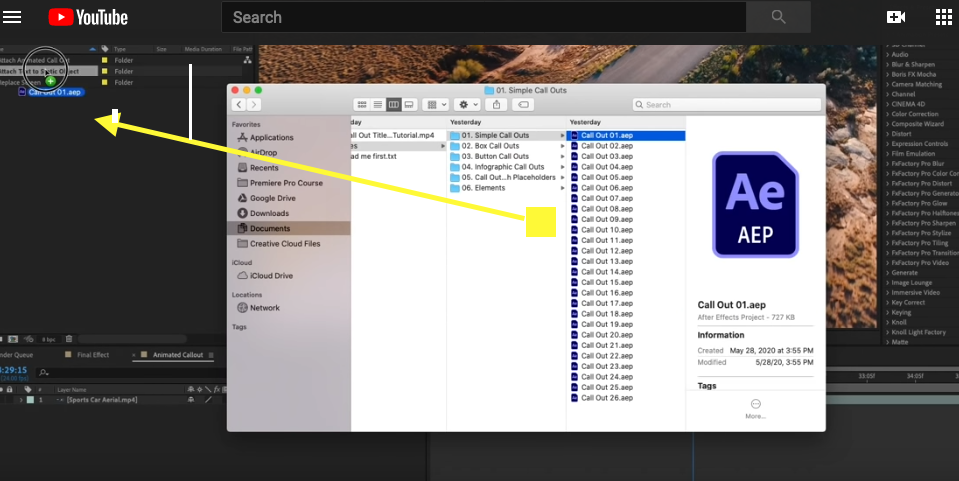
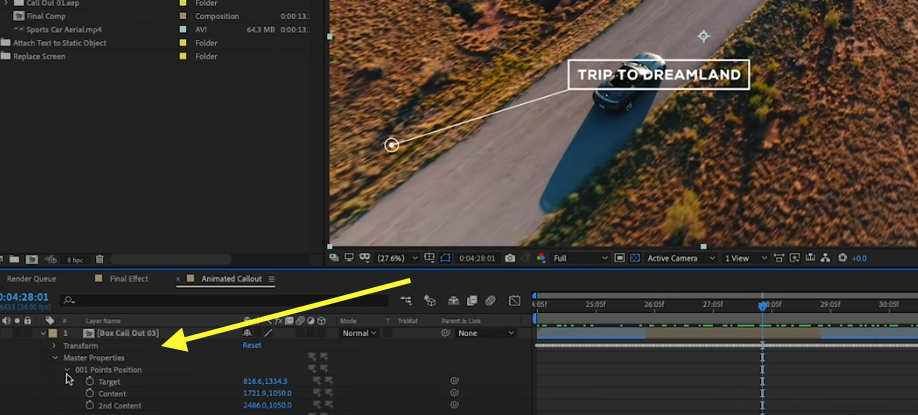
For the first tracking point, you will use Box Call Out 03. Open the folder, then the tracking comp folder. Next drag that comp into the Composition that you have open. Adjust the length of the callout layer by using the end of the call out layer. You’ll notice the blue handles will remain the same.

Next you will begin tracking the motion. Begin by moving your playhead to the beginning of the comp. Now select the video clip layer, go to the tracker panel and click “track motion”. Like the previous effect, zoom in on the comp and move your tracker point to a point with high contrast.

Proceed to the Tracker panel and select Edit target, make sure you select the box call out layer. Then hit play until it finishes the duration of the composition. Once that is finished, hit apply.
Now you will need to make some adjustments as the call out will be out of place. Open up the box call out layer, then click Master Properties. Here you will start with Points position where you can adjust target and content parameters. The content parameters will move the text and line together. Zoom in and make any necessary adjustments. When set, go down to Text block settings which is right under Point position. You will use this to move the text over. Going back to Content under Points position, you may continue to adjust the content until it fits the scene. Under Dot & Line Settings, you can adjust the dot and line options with ON and Off buttons, As well as their size, color, and shape. Once all settings are to your liking, you can proceed to your next call out and repeat the Process until you have completed all call outs.
Note: If you would like to edit the text inside the call out, this is definitely possible. Go to the call out folder > All Folder > Text Blocks > Then modify the text block as necessary.
3. Screen Replacement in a moving shot & How to Remove Tracking Points
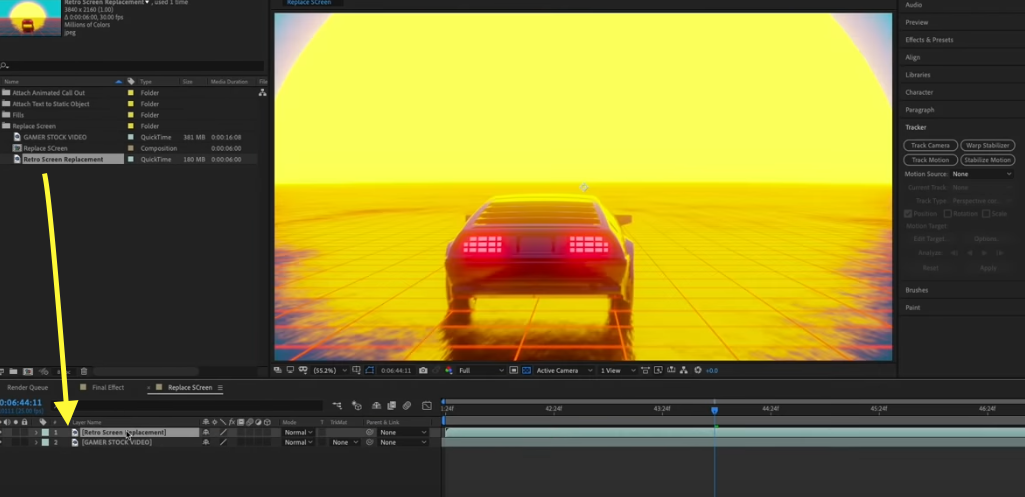
Begin with your own video clip in your composition. For demo, we’ve downloaded some stock video footage in composition which includes tracking points already included on the screen. You’ll find that stock video sites will typically have green screen videos and some will include tracking points on their media.
Next, drag and drop your screen replacement footage into the composition as well.

With the green screen video clip selected, move the playhead to the beginning of the comp. Go to the Tracker panel and select Track Motion. From the Track Type drop down, choose Perspective corner pin. Next adjust your track points to the desired tracking points.

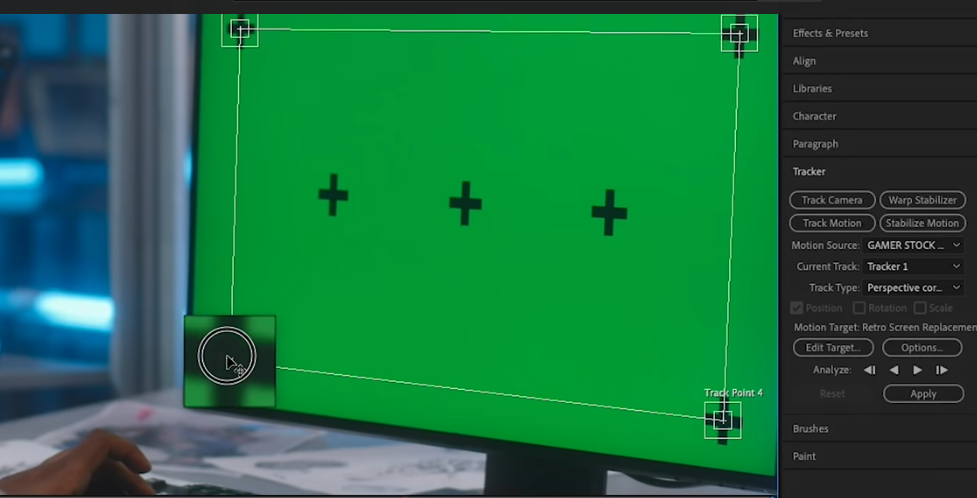
Once that is done, go to the Tracker panel and select “Edit Target”. Select Retro Screen Replacement in the Motion Target Pop up window. Then hit play until it is done tracking. When the tracking is done, hit “ok” to apply motion.
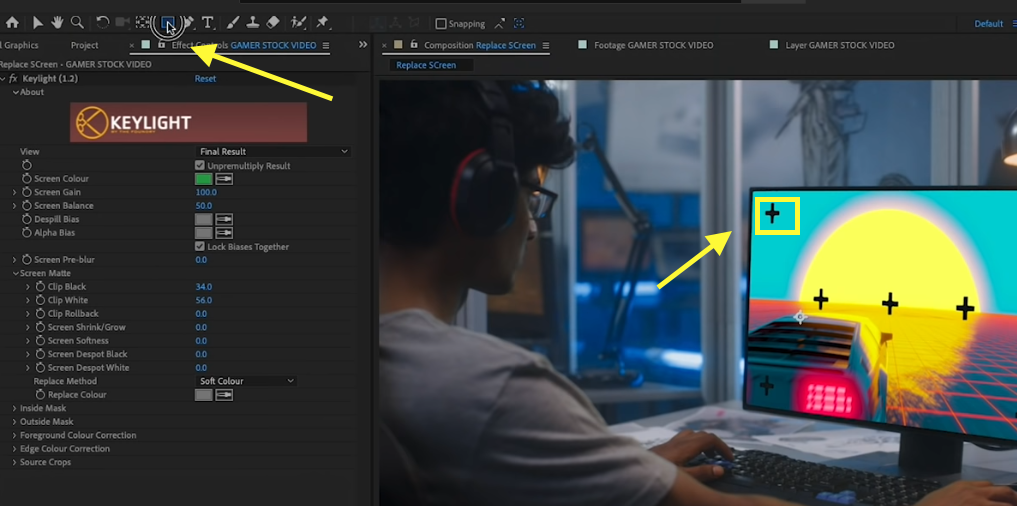
Before you scale up the replacement screen, you will need to chroma key (or remove the green from the monitor). To do this, begin by dragging the replacement video beneath the green screen video clip layer. Go to effects and search for “Key Light” and double click to apply to gamer Stock video clip. Next, go to Effect Controls and use the screen color dropper to select the green from the monitor.
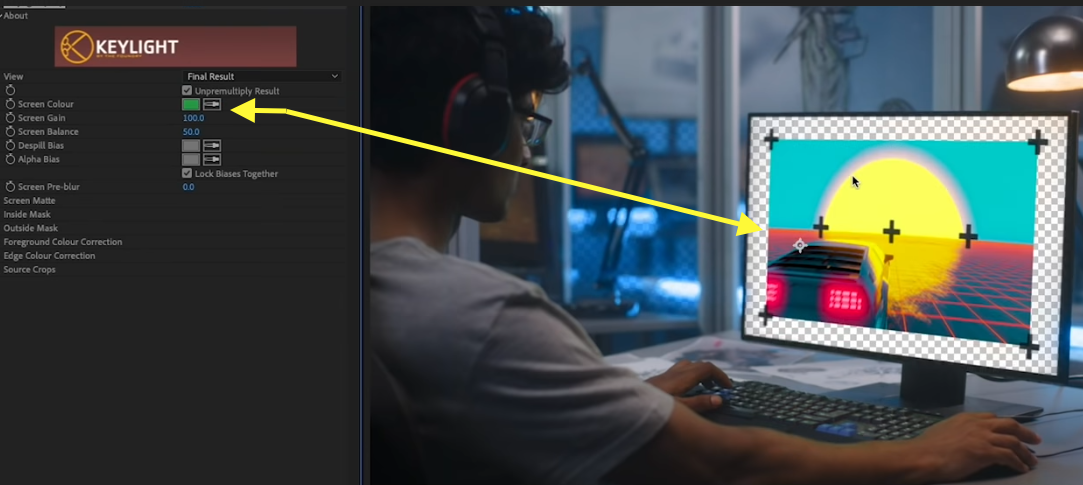
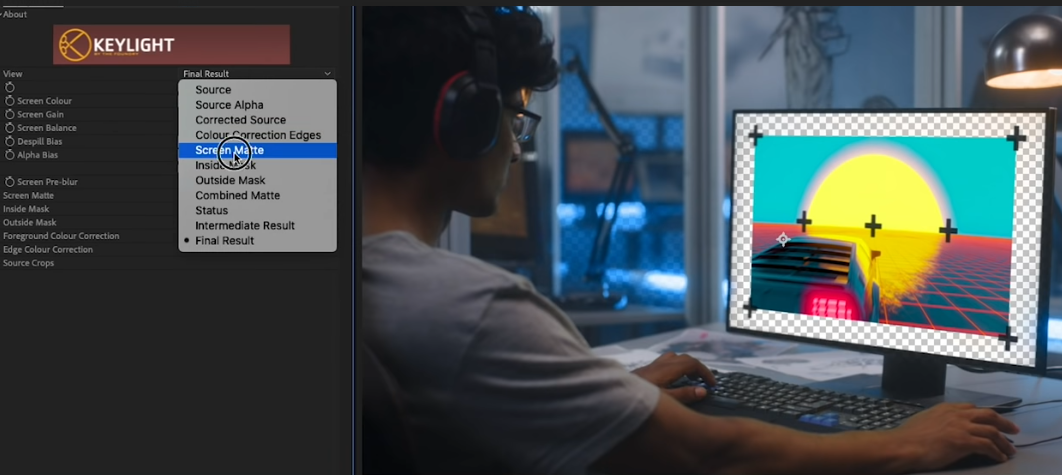
To the left you will observe that there is some transparency to the left of the computer in the scene. To fix this, go to View and then from the drop down menu, select Screen Matte. As you can see below, there are some grey areas. The grey areas are mean it’s partially transparent, which we don’t want, so we need to eliminate all of the grey. To do this, we will toggle open screen matte and lower value down on Clip White until all of the grey disappears. Then increase the value on Clip Black to remove grey from around the corners of the screen.

Next, we can scale up the screen replacement layer. Select the Retro Screen Replacement Layer, use “S” on the keyboard to bring up Scale. Then adjust to have the retro screen layer fill the computer monitor in the clip.
Next, it’s time to remove the black tracking points. To do this, you will create some subtracting masks on the stock video clip. Select the stock gamer layer, then go to the rectangle tool. Next, drag the rectangular mask around the tracking point. You will notice that a Mask was created. Select Subtract from the mask type drop down; this will erase the tracking point completely.
Use the rectangle tool to draw a mask.
As you watch your updated video clip, you will notice the tracking point appears outside of the mask area because of the camera movement. To correct this, you will need to animate (keyframe) the mask so it can move with the video clip and continue to completely cover the tracking points. To do this, click on the stopwatch to the left of the mask path and scrub through until you see the tracking point appear outside of the mask. Then hit “V” to go back to the selection tool to move the mask and cover up the tracking point. Use “V” to move the mask. Repeat mask creation and mask animation for all four corners and then create one large mask for the center tracking points.
